
A Day in the Life of a Professional Retaining Wall Installer
Introduction
If you have actually ever driven through an area or wandered into a perfectly landscaped backyard, you've most likely experienced maintaining walls. These structures aren't simply functional; they can be visually pleasing too. But have you ever stopped to consider the specialists behind these impressive installations? In this article, we'll plunge deep into A Day in the Life of a Professional Retaining Wall Installer, exploring the tools, techniques, and experiences that form their workday.
A Day in the Life of a Professional Retaining Wall Installer
A common day for a professional retaining wall installer begins early, frequently before the sun rises. The noise of alarm clocks shattering the silence is soon followed by the pressure of preparing yourself-- wearing work boots, getting lunch, and loading up equipment like timber sleepers, concrete sleepers, and H beams into trucks.

Preparing for Work: The Morning Routine
Every successful day begins with preparation. The installer checks weather since rain can halt development on outside tasks. After evaluating e-mail communications and task strategies from clients, it's time to hit the road.
- Packing the Truck: Necessary tools such as shovels, drills, and levelers are filled together with materials.
- Safety Equipment: Construction hats, gloves, and goggles are important to guarantee security on site.
Arriving on Website: Setting Up for Success
Upon arrival at a job site, installers require to assess their surroundings. Is the ground level? Are there any underground utilities that might complicate work? These aspects are vital in determining how finest to proceed.
Conducting Site Assessments
A comprehensive site assessment generally involves:
This groundwork is necessary for ensuring that whatever retaining wall is built will hold up over time.
The Significance of Planning: Creating the Retaining Wall
Once assessments are complete, it's time to create the wall. This stage involves partnership with landscape designers or property owners to select styles and products-- whether it's timber sleepers, concrete sleepers, or other materials.
Choosing Products Wisely
Different materials feature special benefits:
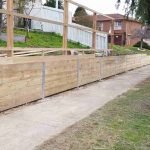
- Timber Sleepers: Deal a rustic appearance however may require more maintenance.
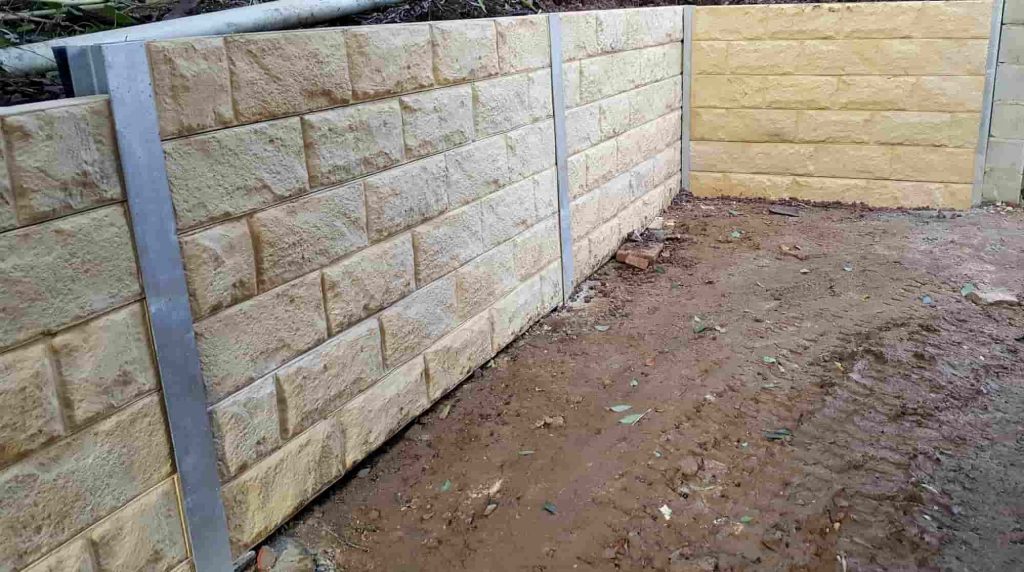
- Concrete Sleepers: Understood for their resilience and contemporary aesthetic.
- H Beams: Provide structural stability for bigger walls.
Laying the Foundation: Digging Begins
Next up? Digging! This part of the process can be labor-intensive but is vital for structural integrity.
Building Up: Putting together Materials
With trenches prepared, it's now time to assemble products based on style requirements. Starting from below ground level offers stability for taller walls, minimizing pressure from soil movements.
Inserting H Beams
cream chargersWhen structure heavier walls utilizing H beams:
Adding Finishing Touches: Top Layer Installation
As installations progress upward, it's important to take care during this stage:
- Ensuring each layer is well compacted
- Making sure every piece fits snugly versus its neighbors
The last layers typically involve ornamental aspects or caps that improve visual appeal while offering additional strength.
Quality Checks: Guaranteeing Longevity
After setup comes quality checks:
These steps help avoid future complications like erosion or moving soil beneath the wall.
Cleanup Duties: Leaving No Trace Behind
Once pleased with their work, installers will tidy up their workspace:
- Removing excess material
- Cleaning tools and equipment
- Ensuring no debris is left behind
This not only reflects professionalism but likewise appreciates client property and surrounding areas.
Client Interaction: The Final Step
Communication with clients is key throughout any task:
- Discussing maintenance tips
- Going over service warranties on products used
- Answering any lingering questions about care
This develops trust and enhances their role as specialists devoted to quality service.
FAQ Section
1. What types of products do professional installers use?
Professional installers frequently use lumber sleepers, concrete sleepers, and H beams depending upon particular project needs.
2. The length of time does it require to set up a maintaining wall?
The timeline differs based on size and complexity but generally ranges from one day to a number of weeks for bigger projects.
3. Can I install my own keeping wall?
While do it yourself installation is possible with proper knowledge and tools, hiring experts ensures strength and longevity due to their competence in building methods.
4. What prevail problems faced during installation?
Common concerns consist of unanticipated drainage problems or unsteady soil conditions which can complicate style plans Mr cream chargers nearby significantly.
5. How do I preserve my retaining wall after installation?
Regular evaluations are important; try to find fractures or indications of disintegration around bases routinely-- attending to issues without delay can prolong life span significantly!
6. Are there permits needed before constructing a keeping wall?
Yes! Many towns need licenses before building begins due to zoning laws or guidelines relating to land usage-- always examine regional requirements first!
Conclusion
In conclusion, being a professional retaining wall installer isn't practically physical labor; it's an art form needing accuracy planning, imagination in design choices like selecting between timber sleepers versus concrete sleepers or choosing when H beams enter into play-- all while keeping quality interaction with clients along every step!
Understanding both obstacles dealt with daily-- from dealing with unforeseeable climate condition down through detailed engineering concepts-- guarantees these professionals remain unfaltering leaders within landscaping industries today!
So next time you admire a perfectly built retaining wall while enjoying your morning coffee outdoors? Keep in mind those skilled hands behind its development-- they truly make all difference!